
Do you block your quilts when they’re complete? I do, most of the time. Blocking helps the quilt lay flat and hang straight, and can help counteract slight ruffling or waviness in the borders. Here’s what you’ll need:

- Am old, clean sheet or piece of fabric bigger than the quilt (helpful to keep lint or pet hair off the quilt, and a bit of the moisture off the carpet)
- One wet quilt (I wash most of my quilts in the washer, either with a clear water pre-wash and then soap, or just clear water; you can also start with a dry quilt, and sprinkle or spray water on it to thoroughly wet while it’s on the floor)
- A tape measure
- A Stanley S2 Laser Level Square (more on this tool here), or a 15″-24″ square acrylic ruler
- An oscillating fan
- One cat (optional)
Spread out the sheet on the floor, ideally in a room or area that you can close off for 24 hours to keep curious pets or kids away from the quilt while it dries flat. Carefully spread out the quilt on the sheet, patting it into shape, but not stretching it. Smooth out any bubbles or wrinkles, and try to make the borders look square and even.
Once the quilt is looking as flat as possible, measure across the top, middle and bottom of the quilt. If these measurements are not the same on the top middle and bottom, pat, smoosh, and mash the quilt lightly until they are. Yes, these are very technical methods here, smooshing and mashing.
Keep working with it until the the measurements are even, and then measure the left, right and center of the quilt top to bottom and repeat the smooshing and mashing process until these three measurements are equal as well.
Once the measurements in each direction are equal, use the Laser Level Square (or the large square ruler) to square up the quilt. The Laser Level Square shines a red laser line all the way down each side of the quilt from the corner to help you straighten the quilt. Using a large square ruler isn’t as easy, but you can at least square up each corner, and eyeball the sides between them to make them straighter. More smooshing and mashing may be required to make the quilt look like a square or rectangle rather than a parallelogram. Examine each corner and side and smoosh and mash until everything is straight and each corner is a 90 degree angle.
Use the measuring tape to check the measurements one more time, in case anything changed while you were squaring it up. Leave the quilt to dry on the floor for 24 hours, or until completely dry. Picking the quilt up while it’s still damp undoes all your hard work! Use an oscillating fan to help speed the drying process.
I block my quilts before I sew on a hanging sleeve or a label. If a quilt is ever washed after it’s been hanging a while, it should be blocked again while drying. I do block most of my quilts that are meant to hang, even king size show quilts, but I don’t block lap or bed quilts if they won’t ever be hung on a wall.
That’s my blocking method; if you have anything to add or a link to your method, share it!

You might also like
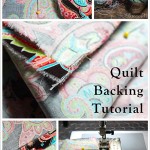 Quilt Backing Tutorial
 Let’s Talk Machine Quilting (and a Giveaway!)
 Fun Fabrics for a New Quilt Project
 The Quilt That Refuses to Be

 Let’s Talk Machine Quilting (and a Giveaway!)
 Fun Fabrics for a New Quilt Project
 The Quilt That Refuses to Be
GREAT tips, Nadine! I learned a thing or two, and will definitely have to add the laser tool to my quilt blocking tool arsenal. Personally, however, I think a cat should be mandatory — not just optional!
Nadine,
Do you pre-shrink your battings in any way? When I block I pin the edge every 1″ or so in order to keep the quilt flat as it dries, otherwise the batting will shrink and distort the edge. I love the look the quilt gets as the batting shrinks a little and the quilting becomes more prominent.
Great pictures and a beautiful quilt to demonstrate on!
Ann
How did you know I was having wavy border syndrome! Now I know what to do! I just hung up an old quilt from the BFQ block exchange and one side is just not right. I’ll have to add quilt blocking to my to do list for this week.
Have a great week
Dawn
My blocking method is the same, except that I don’t have that handy dandy Stanley laser tool. I NEED one of those!
Didi,
You just helped me with my christmas shopping list! I know Peter would love a new tool and I love buying him tools I can borrow!
Hi Ann! I’m so sorry. I just realized that I never answered your question and comments here! I don’t pre-shrink battings, never have. I don’t find that the quilt shrinks up any as it dries, and I did measure this one in the picture after I read your comment and it measured the same as it did after I got it all squared up while it was wet. I do usually use a polyester batting though, so maybe that’s why I haven’t experienced any shrinkage as the quilts dry.
That all being said, I’m not terribly particular about what size a quilt ends up being in the end anyway. A bit of shrinkage when it’s quilted and washed is just a natural thing, and it does make the quilting stand out a bit more.
Thanks for your comments about the quilt!
Kimberly, you and my cats would get along fine, since they think they’re mandatory as well!
Hey Dawn! Let me know how the BFQ quilt came out after blocking. Glad to help with the Christmas list too!
Hi Kristin! Yes, it definitely comes in handy for these quilting things! And you can always loan it out to the man of the house if needed, as long as he remembers where it belongs. 😉
Pingback: Quiltie Comments » Project Quilting Winner!
Do you have a pattern for the lovely quilt in these photos?