
After Kathy’s great and precise tutorial at Pink Chalk Studio, this one probably seems a bit slap-dash, but hey, there’s always more than one way to go about it! If I had a set of those ginormous cutting mats in my studio, I might be a bit more precise and exacting when I cut my backings. I work with a 24″ x 26″ mat however, which isn’t exactly tiny, but you can’t really cut huge backing-sized pieces of fabric on it. I did think about getting those mats and adding another giant cutting table to the studio, but at the moment, I’m more in love with the floor space than I would be with more furniture in the room. 🙂
So here’s Nadine’s quick and dirty, rip-it-up backing tutorial:
- Measure your quilt top from the top to the bottom, and add 6-8″.
- If your quilt top is less than 36″ wide, divide this measurement by 36″ and purchase this much yardage for your backing. Lay the batting and the quilt top on the backing with the sides of the quilt top parallel to the selvedges of the backing and baste. Having the sides of the quilt parallel to the lengthwise grain (and the selvedges) will help the quilt hang straighter and with less waviness in the borders.
- If your quilt top is more than 36″ wide, multiply the number from step 1 above by 2. Divide this number by 36″, add 1/8-1/4 yard for possible shrinkage and off grain issues, and purchase this much yardage for your backing and follow the rest of the tutorial below.
- Here’s where the fun begins! Take the yardage from step 3, and cut a small snip in the selvedge at the halfway point, and then rip the length of yardage in half crosswise, so that you have two chunks that are 6-8″ longer than your quilt top. RRRRIIIIPPPP!
- Now tear the selvedge from one side of one of the chunks—pick the printed selvedge side if there is one, so that you can keep track of the fabric print direction, especially if you’re working with a directional print and want both halves of the backing to be “right side up!” Just make a little snip into the fabric about ½-¾” in from the selvedge edge, and tear the whole selvedge off, like this:

Tear the opposite selvedge from the other chunk of backing fabric, in other words, if you’ve torn off the selvedge with all the dots and fabric manufacturers marks from the first chunk, tear the selvedge without all those marks off the second chunk. This is what’s left, one selvedge with printing, one without, and a bunch of string bits:

I know Jodie is out there salivating over the selvedge; I did save it Jodie, to start my collection so that I’ll be ready when you write that book!
- Press the fabrics, including all those torn edges, because they’ll all be a little ruffly and stretched at this point. Trust me, it won’t matter one bit later, but pressing now is good for ease of construction.

- Pin the lengthwise torn edges together; it’s good to lay the two chunks on a cutting mat or table so that they’re flat when pinning.

Don’t worry about whether both ends match up when you’re done pinning. It’s likely they won’t and it doesn’t matter anyway.

- Sew the torn edges together with about a ½” seam. See how I’ve moved the needle a bit to the left, so that the torn edges stick out to the right? I can keep the torn edges lined up on that line on the bed of the machine this way, and more of the seam allowance is under the presser foot for easier sewing.

- Press the seam open. I really like how the torn edges create a really flat seam allowance. It kind of gradually fades awayon the sides, so that there’s not a bump on each side of the seam where the edge of the seam allowance is.

Using a ½” seam allowance here keeps any of the little spots where the fabric grain is out of whack after tearing from showing on the right side, and gives a little more stability to that seam in the backing fabric.
- Layer the batting and the quilt top on the backing, with the sides of the quilt parallel to the selvedges of the backing, centering the quilt center on the backing seam line and centering the quilt from top to bottom on the backing. If there’s a lot of excess backing fabric on the sides of the quilt sandwich, you can tear it off, leaving 3-4″ outside the quilt top on each side.
- Baste, quilt, bind, enjoy!


Well, okay, that last step is shortened a bit, but that’s not part of this tutorial anyway! It doesn’t really matter if the quilt backing is perfectly square or rectangular, or has perfectly straight ends—you’re going to cut off all the edges later when you trim up before binding anyway. The only possible down side to this method is if you end up with a fabric that is so horribly off grain that when you tear it, you lose a quarter-yard because it’s so crooked on the end and you run short on length, and then you might not want to use the fabric for backing anyway. If it’s that far off of being straight, will the quilt hang straight in the end?
This is how I’ve pieced the backings on all my quilts for years, including the quilts for show. Slap-dash but effective, and heck, sometimes ripping fabric is just fun! Let me know if this is helpful, or if you have questions!

You might also like
 Let’s Talk Machine Quilting (and a Giveaway!)
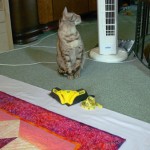 Quilt Blocking–A Short Tutorial
 WFMW–Basting quilts with a tagging gun
 Hoffman 1895 Bali Batik Swatches for Electric Quilt
 Let’s Talk Machine Quilting (and a Giveaway!)

 Hoffman 1895 Bali Batik Swatches for Electric Quilt
Nadine, does this mean you only have one seam down the middle of your backing?
I have shied away from backing construction and have favoured wide backing material, but the selection isn’t too exciting, I know. So you have given me courage to try something more adventurous. My first quilting teacher in 1994 (who did not believe in rotary cutting…) also taught us to rip, from blocks to sashing… Yep, this was my intro to quilting. However, following a quarter of an inch was hard this way… So 1/2″ makes a lot more sense! Thanks so much.
Keep the tutorials coming!
Valentina
Hi Valentina! Yes, there’s only one seam down the middle on this particular backing. Partly, that’s to keep the tutorial simple, but also because I rarely do anything else these days. If you’re making a very large quilt that will be folded a lot, some folks say not to put a seam down the middle because it’s a stress point when the quilt is folded. On larger quilts that I’ve made (bed size +) I have used three lengths of fabric instead of just two, and used one entire fabric width down the middle, with narrower widths down each side so that there’s not a seam in the middle of the backing.
On a quilt that’s pretty small, but wider than typical fabric yardage (36″+) I usually just put a seam down the middle.
This is about the only time I tear fabric, and I’d never do it to actually piece a block or sashing or something. My crazy accuracy freak girl twin would have a fit!
oh, yes… Nadine are you also a swimwear designer? …talented…
Loved the suit!
V.
Heh, you caught me! That’s a sneaky peek of the show quilt I’m working on right now. I can’t decide whether that’s supposed to be a swimsuit or a fancy bra and panties, so I think I’ll leave it open to interpretation!
Pingback: Accessorize Me–with Inchies! | DreamWeaver’s Quilts Quilt Epiphany Blog